 |
1. Cut 2 x 150mm lengths of 25mm
wide webbing, and use these to sew 2 D-rings onto the frame. This must
be done securely, as all the weight of the bag will be taken on these
loops.
2. Determine the length of strap you require:
attach the dog lead clips to the remaining 2 D-rings. Pin one of these
to the end of a length of 25mm wide webbing, with a 30mm overlap. Clip
this onto one of the D-rings on the frame and loosely thread the other
end through the other D-ring and clip. Attach this to the second
D-ring on the frame and find the most comfortable length for your
strap. I use my strap to support the bag slung over my back, not just
on my shoulder, so I need to allow enough room to get the strap over
my head with a fully laden bag attached. Remember to allow a bit of
slack for the padding and 30mm at each end to attach to the D-rings. I
use 830mm for my strap length. Do not sew the D-rings on yet. |
 |
3. Stab-stitch the padding to the
middle of the strap to hold it in place - use large stitches, and put
the strap on top of the padding, curving the whole thing as it would be
on your shoulder. |
 |
4. Sew the strap cover into a
tube, and thread over the padding and strap. This is a tight fit, so is
a bit tricky. I like to position the seam underneath.
5. Fold the ends of the strap cover in around
the webbing strap, and sew into place - keep the padded bit curved
when you do this.
6. Sew the D-rings and clips onto each end with
a 30mm overlap. |
 |
 |
|
1. Bind the edges shown in red on the outer back
pattern piece with lycra binding. |
2. Fold the base of all 3 pockets along the
dotted lines and sew together. |
 |
3. Middle pocket : Turn in
and stitch a 15mm hem across the top of the pocket. Sew the hook part of
the100mm length of 20mm wide velcro centrally to the top of the pocket,
facing outwards. Stitch creases to make folds as shown: . Sew down
approx. 40mm from the top. Turn in and stitch a 20mm hem round the sides
and bottom of the middle pocket. |
 |
Make the top flap: sew the
corresponding fluffy velcro in position: Cut 50mm of 25mm wide webbing,
fold it and sew in position as shown to make a pull tab. Sew the flap
right sides together into a tube, and sew the side and across one end.
Turn right side out, and fold in the open end. |
 |
Top stitch the ends and along the
seam side. |
 |
Sew into position: pin the pocket
onto the outer back in the position shown below, and sew through the
double thickness of material close to the edge of the fold.Sew the top
flap in position so the velcro closures match up. Just sew across the
top of the flap so that it can be pulled right up to allow access to the
pocket. |
|
4. Roll top pockets : Sew
the back flap to the front piece with a 20mm hem at the sides, right
sides together. Turn in and sew a 20 mm hem round the top. Cut 2 pieces
of 20mm wide webbing 100mm long for each pocket. Pass through the 20mm
side release buckles, fold in half, and sew into place. Fold the pocket
flat to find where to sew the buckles onto the pocket top. The webbing
should overlap the pocket by approx. 25mm, and should look similar to
the drawing of the bag top below. |
 |
Turn in and sew a 20mm hem round
the sides and bottom of the pocket. Pin and sew into place on the outer
back as above, sew twice across the pocket base for strength. It is
easier to sew the base of the back flap in place from inside the pocket.
The pockets close by folding and rolling 2-3 times, and locking the side
release buckles into each other.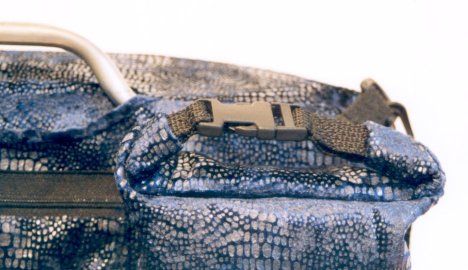 |
 |
5. Sew hook velcro to
the 50mm webbing straps as shown and attach to outer back where
indicated on the outer back pattern piece. There is a 10mm overlap
between the webbing and the outer back. The webbing should hang down
from the outer back, and the velcro should be on the inside, so that it
can secure the bag to the frame by attaching to the fluffy velcro on the
base.
6. Sew fluffy 50mm wide velcro to the outside of
the base where shown on the pattern. |
 |
7. Sew top of outer
back to inner back along sewing line (right side to right side), with
the outer back up. The outer back is slightly larger than the inner back
to allow for the frame to be inserted. Let the edges overlap - do not
match them up yet. Double sew these seams as the weight of the bag will
hang from here.
8. Fold outer back down, and sew sides of outer
and inner backs matching edges flat and leaving 15mm at the base to
allow for the frame to be fitted into the pocket. |
 |
9. Sew the two 25 x
300mm webbing straps to the front as shown on the pattern piece. Add a
reflective strip if wanted.
10. Seal all exposed seams with liquid seam
sealant, and leave to dry.
11. Sew front to inner/outer back unit along
side seams (right sides together).
12. Turn in 30 mm hem around top, and stitch in
place. Either leave an opening along the back to insert the stiffener,
or sew on 0.35m velcro to hold the bag closed when rolling. If you are
using a stiffener, stitch downwards to make a pocket to keep the it in
place. Do not insert the stiffener yet. |
 |
13. Cut 2 pieces of
25mm webbing 150mm long for the top straps. Thread thought the
non-adjustable half of the 25mm side lock buckles (the bit with 1 hole
for the webbing), and sew as you did for the roll top pockets. Sew on to
bag level with the top edge. To find the correct position, fold the bag
flat as shown.The top of the bag should now look like this there should
be approx. 30mm between the bag and the buckles: |